
Table of Contents
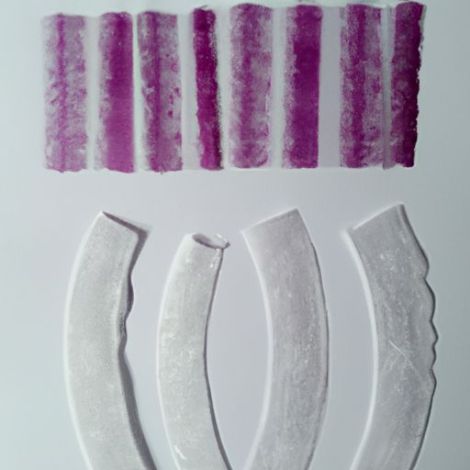
ขั้นตอนแรกในการทำลูกไม้ปักแบบใสคือการเลือกขนาดที่เหมาะสมสำหรับโครงการของคุณ ลูกไม้ปักใส มีให้เลือกหลายขนาดความกว้าง ทั้ง 6 มม. 8 มม. 10 มม. และ 12 มม. ขนาดที่คุณเลือกจะขึ้นอยู่กับรูปลักษณ์ที่คุณต้องการและประเภทของเสื้อผ้าหรือเครื่องประดับที่คุณกำลังตกแต่ง
เมื่อคุณเลือกขนาดของลูกไม้ปักที่ชัดเจนแล้ว คุณก็สามารถเริ่มกระบวนการสร้างดีไซน์ลูกไม้ได้ เริ่มต้นด้วยการตัดกระดูกพลาสติกใสสำหรับรัดตัวตามความกว้างและความยาวที่ต้องการ จากนั้น ร้อยด้ายในจักรเย็บผ้าด้วยด้ายปักสีที่เหมาะกับผ้าของคุณ
ขณะเย็บ อย่าลืมใช้ตะเข็บเส้นตรงและฝีเข็มปานกลางเพื่อสร้างดีไซน์ลูกไม้ที่ละเอียดอ่อนและซับซ้อน คุณสามารถทดลองใช้รูปแบบการเย็บและเทคนิคต่างๆ เพื่อให้ได้ลุคที่ต้องการสำหรับลูกไม้ของคุณ
ในขณะที่คุณเย็บต่อ อย่าลืมปักกลับที่จุดเริ่มต้นและจุดสิ้นสุดของแต่ละแถวเพื่อยึดตะเข็บและป้องกันไม่ให้หลุดออก ใช้เวลาและทำงานอย่างระมัดระวังเพื่อให้แน่ใจว่าการออกแบบลูกไม้ของคุณเรียบร้อยและสม่ำเสมอ
เมื่อคุณเย็บลูกไม้ปักที่ชัดเจนเสร็จแล้ว ให้ค่อยๆ ตัดด้ายส่วนเกินออก และนำด้ายที่หลุดออกหรือรอยเย็บที่หลวมออก คุณยังสามารถใช้กรรไกรปลายแหลมเพื่อเล็มขอบที่ไม่เรียบหรือด้ายที่หลุดออกอย่างระมัดระวังเพื่อสร้างงานปักที่สะอาดและสวยงาม
หลังจากคุณปักลูกไม้ใสเสร็จแล้ว คุณสามารถติดเข้ากับเสื้อผ้าหรือเครื่องประดับโดยใช้เข็มและ กาวด้ายหรือผ้า อย่าลืมยึดลูกไม้ให้เข้าที่อย่างระมัดระวังเพื่อป้องกันไม่ให้หลุดหรือหลุด
โดยสรุป การทำลูกไม้ปักแบบใสขนาด 6/8/10/12 มม. อาจเป็นโปรเจ็กต์ที่สนุกและคุ้มค่าสำหรับช่างฝีมือทุกระดับ ด้วยการทำตามขั้นตอนง่ายๆ เหล่านี้และใช้วัสดุและเครื่องมือที่เหมาะสม คุณสามารถสร้างการออกแบบลูกไม้ที่สวยงามและซับซ้อนเพื่อเสริมเสื้อผ้าและเครื่องประดับของคุณได้ ทดลองใช้ขนาดและเทคนิคต่างๆ เพื่อสร้างดีไซน์ลูกไม้ที่เป็นเอกลักษณ์และเป็นส่วนตัว ซึ่งจะเพิ่มความหรูหราให้กับทุกโครงการ
The first step in making clear embroidery Lace is to select the appropriate size for your project. Clear embroidery lace is available in a variety of widths, including 6mm, 8mm, 10mm, and 12mm. The size you choose will depend on the look you are trying to achieve and the type of garment or accessory you are embellishing.
Once you have selected the size of your clear embroidery lace, you can begin the process of creating the lace design. Start by cutting a piece of clear plastic bone for corset to the desired width and length. Next, Thread your sewing machine with embroidery thread in a color that complements your Fabric.
As you sew, be sure to use a straight stitch and a medium stitch length to create a delicate and intricate lace design. You can experiment with different stitch patterns and techniques to achieve the desired look for your lace.
As you continue sewing, be sure to backstitch at the beginning and end of each row to secure the stitches and prevent them from unraveling. Take your time and work carefully to ensure that your lace design is neat and uniform.
Once you have finished sewing your clear embroidery lace, carefully trim any excess thread and remove any stray threads or loose stitches. You can also use a pair of sharp scissors to carefully trim any uneven edges or stray threads to create a clean and polished finish.
After you have completed your clear embroidery lace, you can attach it to your garment or accessory using a needle and thread or fabric glue. Be sure to secure the lace in place carefully to prevent it from shifting or coming loose.
In conclusion, making clear embroidery lace in 6/8/10/12mm sizes can be a fun and rewarding project for crafters of all skill Levels. By following these simple steps and using the right materials and tools, you can create beautiful and intricate lace designs to enhance your garments and Accessories. Experiment with different sizes and techniques to create unique and personalized lace designs that will add a touch of elegance to any project.